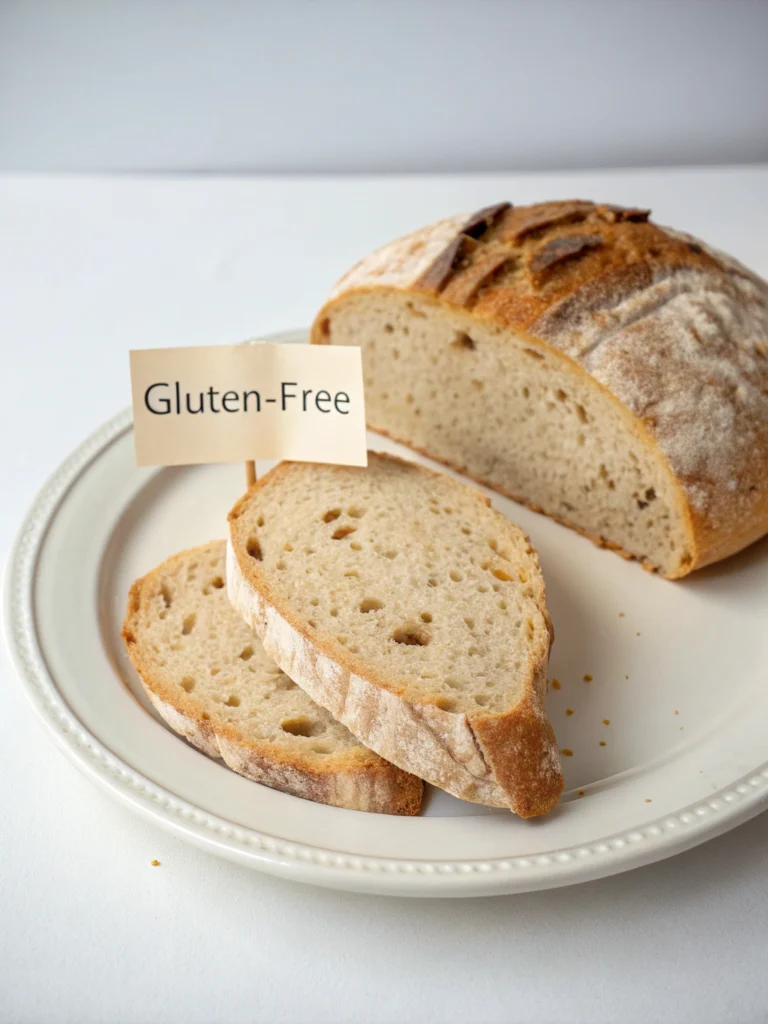
5 Best Gluten Free Sourdough Bread Recipes for a Healthy Crust
Have you ever bitten into a slice of sourdough bread, only to remember your gluten intolerance moments later? What if you could enjoy that tangy, chewy delight without the digestive consequences? The world of gluten free sourdough bread has evolved dramatically in recent years.
Creating gluten free sourdough bread at home isn’t just possible—it’s surprisingly achievable. With the right flour blend, starter care, and baking techniques, you can craft artisan-quality loaves that rival their wheat-based counterparts. Let’s explore five exceptional recipes that will revolutionize your gluten-free baking experience.
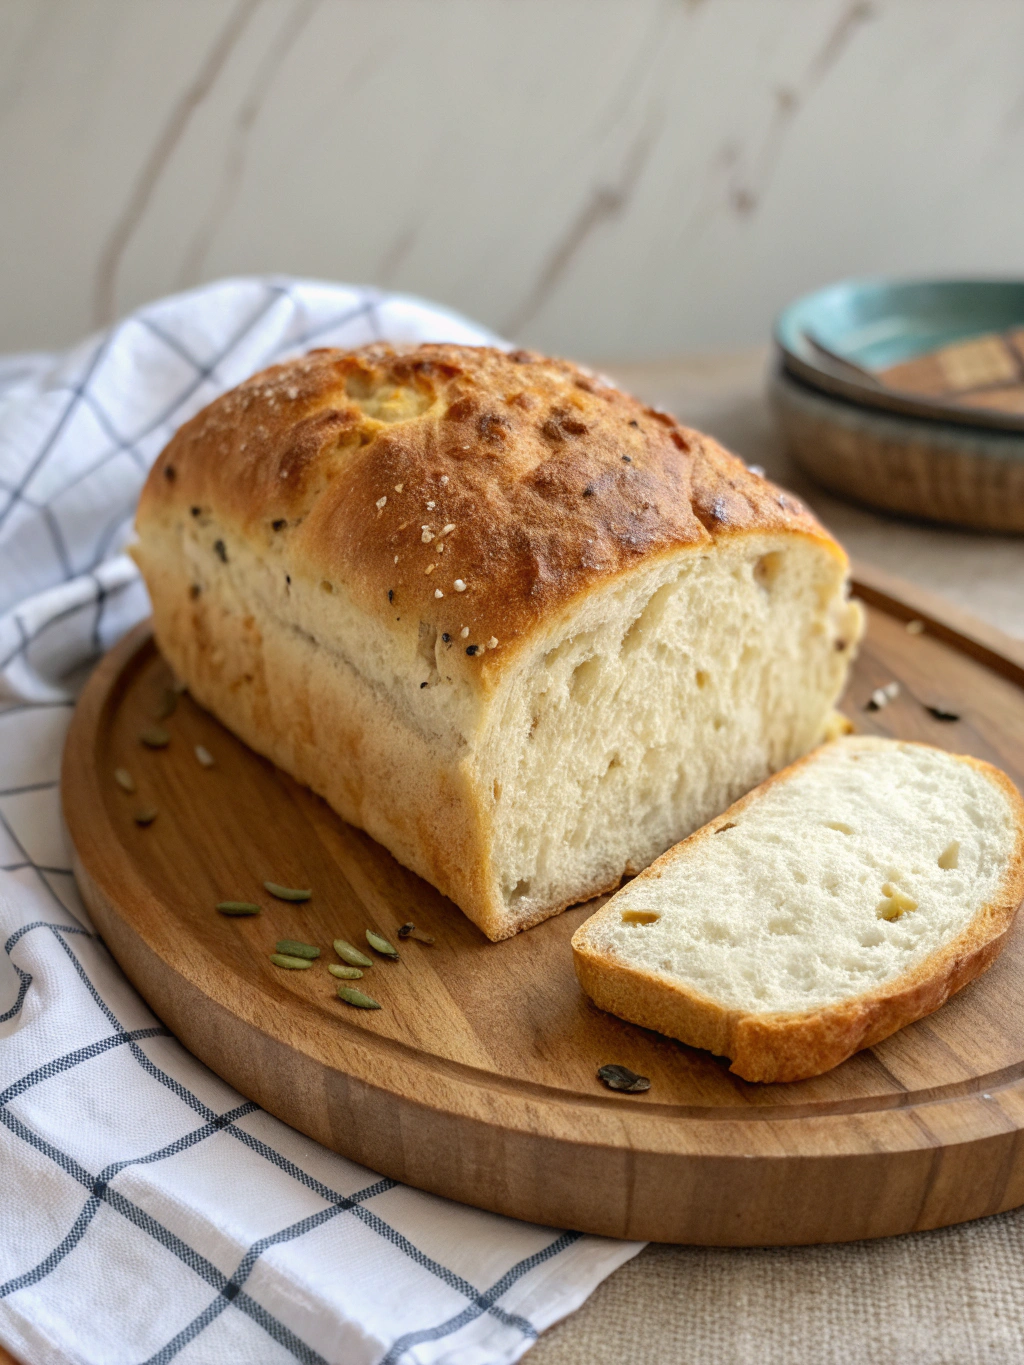
Recipe #1: Classic Brown Rice Sourdough Loaf
This foundational recipe creates a versatile loaf with excellent structure and that distinctive sourdough tang. Perfect for sandwiches or toast, this bread maintains a soft interior with a satisfyingly crisp crust.
Ingredients List

- 2 cups brown rice flour (superfine grind for best texture)
- 1 cup tapioca starch (provides elasticity)
- 1/2 cup potato starch (not potato flour)
- 1/4 cup psyllium husk powder (crucial for structure)
- 1 tablespoon xanthan gum (helps bind ingredients)
- 1 1/2 teaspoons sea salt
- 1 cup active gluten free sourdough bread starter
- 1 1/2 cups filtered water (room temperature)
- 2 tablespoons olive oil
- 1 tablespoon honey or maple syrup (optional, helps with browning)
Substitution options: Sorghum flour can replace brown rice flour for a nuttier flavor. Arrowroot starch works in place of tapioca. For a more nutritious blend, substitute 1/4 cup of the rice flour with quinoa flour.
Timing
- Preparation time: 30 minutes (plus 8-12 hours for starter activation)
- Proofing time: 4-6 hours (significantly longer than wheat-based sourdough, which typically requires 2-3 hours)
- Baking time: 45-50 minutes
- Total time: Approximately 14-18 hours, with most being hands-off fermentation time
Step-by-Step Instructions
Step 1: Prepare Your Starter
Ensure your gluten-free sourdough starter is active and bubbly. Feed it 8-12 hours before baking with equal parts water and gluten-free flour mix. It should double in size and show significant activity before use.
Step 2: Mix Dry Ingredients
In a large bowl, whisk together brown rice flour, tapioca starch, potato starch, psyllium husk powder, xanthan gum, and salt. Breaking up any clumps is crucial for even hydration and texture development.
Step 3: Combine Wet Ingredients
In a separate bowl, mix the active starter, water, olive oil, and sweetener (if using). The temperature of your water matters—aim for 75-80°F (24-27°C) to encourage optimal fermentation without killing beneficial bacteria.
Step 4: Form Your Dough
Pour wet ingredients into dry ingredients and mix thoroughly with a wooden spoon or stand mixer with paddle attachment. Unlike wheat dough, gluten-free sourdough won’t develop gluten strands, so vigorous mixing for 3-4 minutes helps create structure.
Step 5: First Rise
Transfer dough to a clean, oiled bowl. Cover with plastic wrap or a damp towel and place in a warm spot (75-80°F/24-27°C). Allow to rise for 4-6 hours until noticeably increased in size with visible air pockets.
Step 6: Shape Your Loaf
Line a Dutch oven or baking dish with parchment paper. With wet hands, gently shape the dough into a round or oval loaf without deflating it too much. The dough will be stickier than wheat-based sourdough—this is normal.
Step 7: Second Rise
Cover shaped dough and let rise again for 1-2 hours until puffy. During the last 30 minutes, preheat your oven to 450°F (230°C) with a baking stone or inverted baking sheet inside if not using a Dutch oven.
Step 8: Score and Bake
Using a sharp knife or bread lame, score the top of your loaf with a pattern of your choice. This allows for controlled expansion during baking. Bake covered for 30 minutes, then uncover and bake for an additional 15-20 minutes until deeply golden.
Step 9: Cool Completely
Allow bread to cool on a wire rack for at least 2 hours before slicing. This crucial step completes the cooking process and prevents a gummy texture—resist the temptation to cut into it early!
Nutritional Information
- Per slice (based on 12 slices per loaf):
- Calories: 185
- Protein: 3g
- Carbohydrates: 35g
- Fiber: 4g
- Fat: 4g
- Sodium: 295mg
- Compared to conventional wheat sourdough, this gluten free sourdough bread contains approximately 30% more fiber and 15% fewer calories, making it not just allergy-friendly but nutritionally advantageous.
Recipe #2: Buckwheat-Millet Rustic Sourdough
This hearty variation incorporates ancient grains for a robust flavor profile and exceptional nutritional benefits. The combination of buckwheat and millet creates a distinctive earthy taste with a beautiful dark crust.
Follow the same basic method as Recipe #1, but substitute 1 cup of the brown rice flour with 1/2 cup buckwheat flour and 1/2 cup millet flour. Add 2 tablespoons of ground flaxseed for extra nutrition and a slightly nuttier flavor.
Recipe #3: Artisan Sorghum-Teff Sourdough
This African-inspired blend creates a loaf with complex flavors and excellent keeping qualities. Teff, a tiny ancient grain from Ethiopia, adds a subtle sweetness and exceptional protein content.
Use 1 cup sorghum flour, 1/2 cup teff flour, and 1/2 cup brown rice flour in place of the 2 cups brown rice flour in Recipe #1. Increase water by 2 tablespoons and add 1 tablespoon apple cider vinegar for enhanced flavor development.
Recipe #4: Seeded Quinoa Sourdough
This protein-rich variation incorporates complete-protein quinoa and a medley of seeds for a nutritional powerhouse with wonderful texture contrast.
Replace 1/2 cup of brown rice flour with quinoa flour, and add 1/4 cup each of sunflower seeds, pumpkin seeds, and flaxseeds. Brush the top with egg wash (or olive oil for vegan version) and sprinkle with additional seeds before baking.
Recipe #5: Honey-Oat Sourdough
This slightly sweeter variation incorporates certified gluten-free oats for a familiar flavor profile that appeals to even the most traditional bread enthusiasts.
Substitute 1/2 cup of brown rice flour with gluten-free oat flour, increase honey to 3 tablespoons, and add 1/4 cup rolled oats to the dough. Sprinkle additional oats on top before baking for visual appeal.
Healthier Alternatives for the Recipe
- For lower glycemic impact, replace tapioca starch with green banana flour, which contains resistant starch that feeds beneficial gut bacteria. Coconut sugar can replace honey for a lower glycemic option with prebiotic benefits.
- For higher protein content, incorporate 1/4 cup of almond flour or 2 tablespoons of hemp seeds into any recipe variation. These additions boost not only protein but also healthy fats and micronutrients.
- Consider adding 1-2 tablespoons of ground chia seeds for additional omega-3 fatty acids. This modification also improves moisture retention, extending the bread’s freshness by approximately 24 hours.
Serving Suggestions
- Transform your gluten free sourdough bread into bruschetta by toasting slices, rubbing with garlic, and topping with diced tomatoes, basil, and olive oil. The sturdy texture holds up beautifully to toppings without becoming soggy.
- Create exceptional grilled cheese sandwiches using Recipe #4 (Seeded Quinoa). The seeds add delightful texture contrast against melted cheese, while the bread develops an exceptional crispy exterior when buttered and grilled.
- For breakfast, thick-cut slices of Recipe #5 (Honey-Oat) make sublime French toast. The natural sweetness caramelizes beautifully, creating a restaurant-quality dish with minimal effort.
Common Mistakes to Avoid
- Undermixing the dough: Unlike wheat bread where overmixing causes toughness, gluten-free sourdough benefits from thorough mixing to develop structure.
- Using cold ingredients: Room temperature or slightly warm liquids promote better fermentation and rise. Cold ingredients can extend fermentation time by up to 50%.
- Skipping the psyllium husk: This ingredient is non-negotiable as it creates the structure that gluten would normally provide. Without it, your bread will lack proper rise and texture.
- Cutting into hot bread: Patience is crucial—cutting too soon results in gumminess. Gluten-free breads continue cooking through residual heat during cooling.
- Using regular measuring cups for flour: Weighing ingredients (especially flours) yields consistent results. If measuring by volume, use the spoon-and-level method rather than scooping.
Storing Tips for the Recipe
- Fresh gluten-free sourdough is best stored at room temperature in a bread box or paper bag for the first 24 hours. After day one, slice remaining bread and freeze in an airtight container with parchment paper between slices for easy access.
- To refresh day-old bread, lightly sprinkle with water and heat in a 350°F (175°C) oven for 5-7 minutes. This reactivates the crust while warming the interior to an optimal texture.
- For longer preservation without freezing, create a sourdough starter with 2% apple cider vinegar added to the final feeding. This natural preservative approach can extend counter life by up to 72 hours.
Conclusion
- Creating exceptional gluten-free sourdough bread at home is a rewarding journey that delivers both flavor and health benefits. These five recipes provide a solid foundation for exploring the diverse world of gluten-free artisan baking.
- Have you tried making your own gluten-free sourdough? Share your experiences in the comments below, or tag us in your baking photos! For more gluten-free baking adventures, subscribe to our newsletter for weekly recipe inspiration delivered straight to your inbox.
Did You Try Our Recipe?
There are no reviews yet. Be the first one to write one.