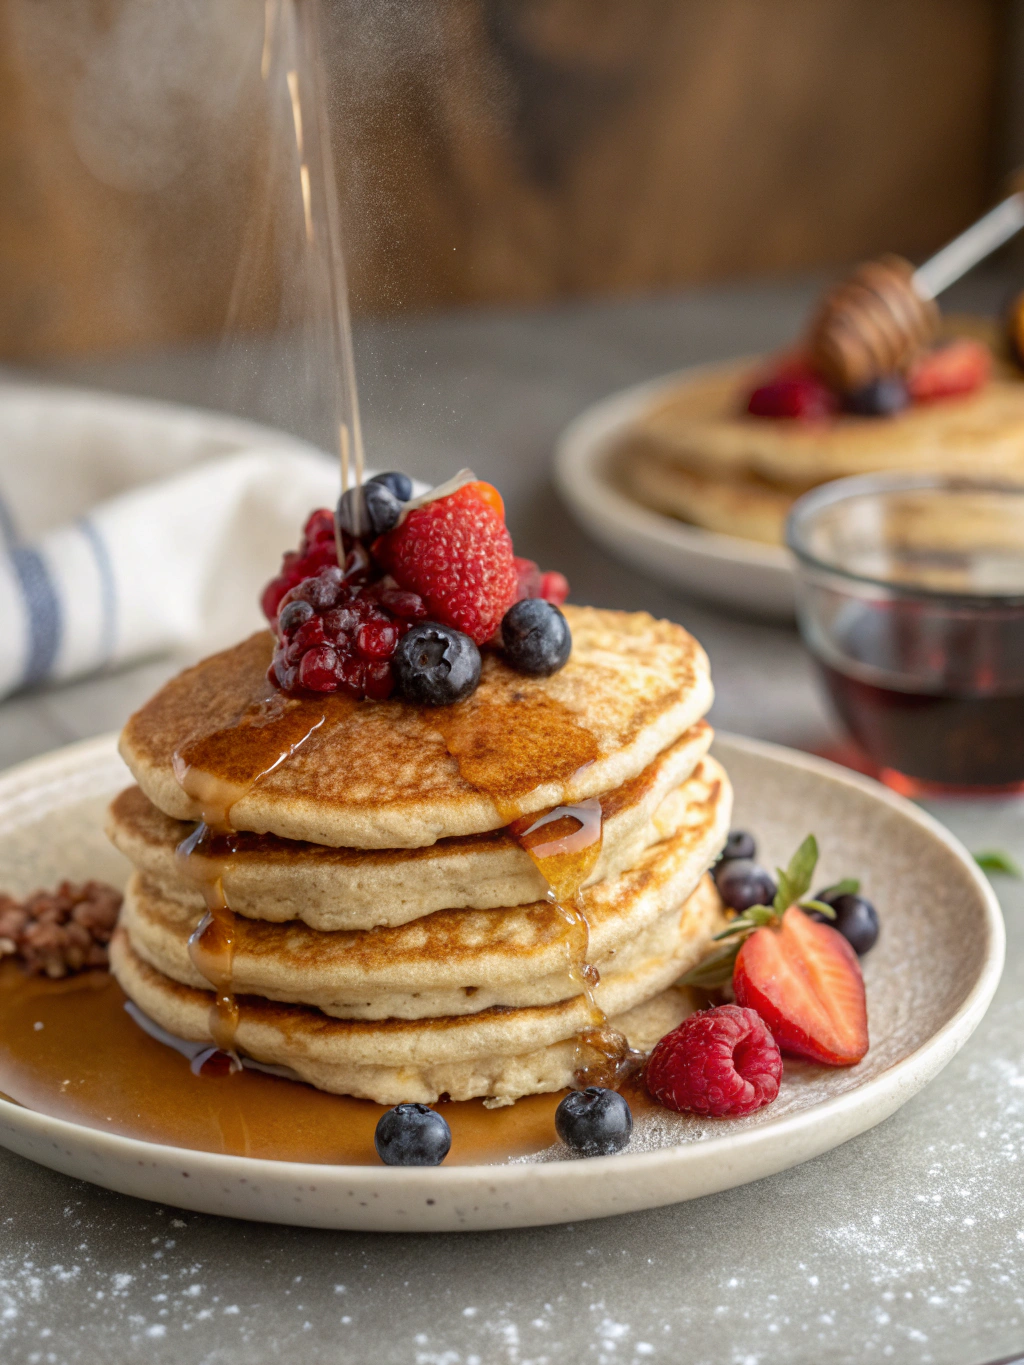
Gluten Free Pancakes: 7 Secrets for Perfect Fluffy Texture Every Time
Have you ever wondered why your gluten free pancakes turn out dense and flat instead of light and fluffy? Many home cooks struggle with this common breakfast dilemma, often blaming their cooking skills when the real culprits might be hiding in plain sight.
Creating perfect gluten free pancakes doesn’t have to be a mystery. With the right techniques and ingredients, you can achieve that restaurant-quality fluffiness that seems so elusive. Today, I’m sharing seven game-changing secrets that will transform your morning routine.
Whether you’re newly diagnosed with celiac disease, have gluten sensitivity, or simply prefer to avoid gluten, these pancake secrets will ensure you never have to compromise on texture or taste again.
Ingredients List
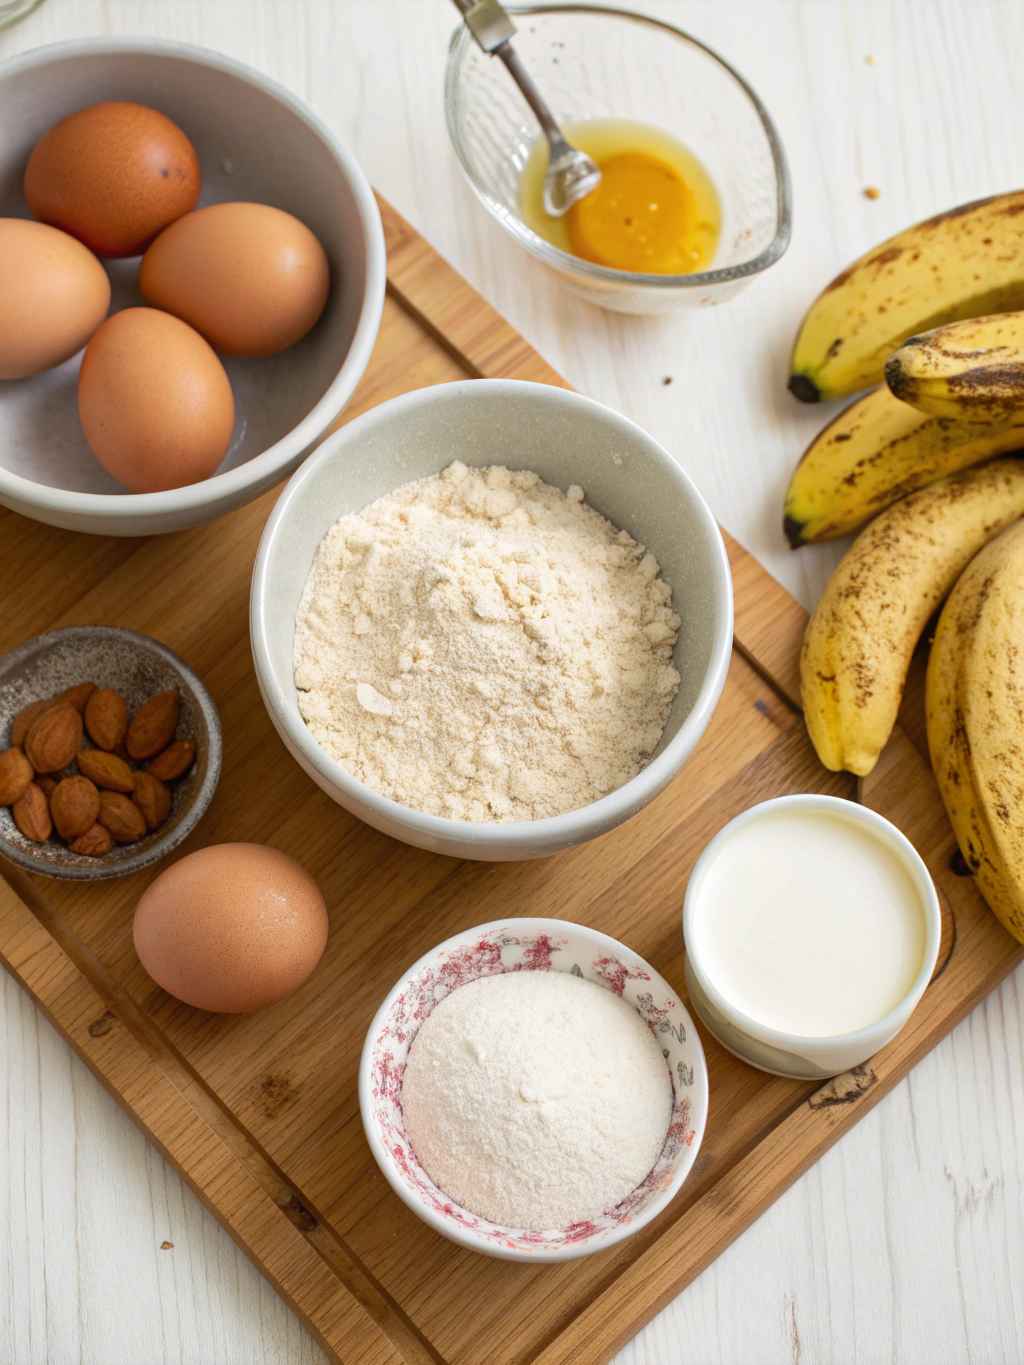
The foundation of perfect gluten free pancakes starts with high-quality ingredients that work together harmoniously. Here’s what you’ll need:
- 1½ cups gluten-free flour blend – Look for one with xanthan gum already included, or add ¼ teaspoon if yours doesn’t have it
- 2 tablespoons sugar – Can substitute with coconut sugar or honey for a less refined option
- 1 tablespoon baking powder – The key to that perfect rise
- ½ teaspoon baking soda – Works with the acid in buttermilk for extra fluffiness
- ¼ teaspoon salt – Kosher or sea salt preferred for better flavor distribution
- 1¼ cups buttermilk – The secret weapon for tenderness (can substitute with milk + 1 tablespoon vinegar)
- 2 large eggs – Room temperature for better incorporation
- 3 tablespoons melted butter – Adds richness (can use coconut oil for dairy-free option)
- 1 teaspoon vanilla extract – For that subtle aromatic sweetness
Timing
- Preparation time: 10 minutes – includes measuring ingredients and mixing the batter
- Resting time: 15 minutes – don’t skip this crucial step that allows the gluten-free flours to fully hydrate
- Cooking time: 15 minutes – about 2-3 minutes per pancake, flipping when bubbles appear
- Total time: 40 minutes – 30% faster than traditional gluten-containing pancake recipes that require longer gluten development
Step-by-Step Instructions
Step 1: Perfect Flour Selection
The first secret to amazing gluten free pancakes is choosing the right flour blend. Not all gluten-free flours perform equally!
- Select a high-quality gluten-free flour blend that contains a mix of rice flour, tapioca starch, and potato starch.
- Ensure your blend contains xanthan gum, which mimics gluten’s binding properties. If not, add ¼ teaspoon to your dry ingredients.
- For extra protein structure, consider adding 1 tablespoon of almond flour to your mix.
Step 2: Precise Mixing Technique
The second secret lies in how you combine your ingredients. Overmixing is the enemy of fluffy pancakes!
- In a large bowl, whisk together all dry ingredients until well combined.
- In a separate bowl, whisk the eggs until frothy, then add buttermilk, melted butter, and vanilla.
- Make a well in the center of dry ingredients and pour in the wet mixture.
- Stir gently with a rubber spatula using no more than 10-12 strokes. Small lumps are good!
Step 3: The Essential Rest Period
Secret number three is perhaps the most overlooked yet crucial step in gluten-free baking.
- Cover your batter and let it rest for 15 minutes at room temperature.
- This allows the starches to fully hydrate and the baking powder to activate.
- During this time, preheat your pan or griddle to ensure even cooking.
Step 4: Optimal Cooking Temperature
The fourth secret is maintaining the perfect cooking temperature for ideal rise and color.
- Heat a non-stick pan or griddle over medium heat (325-350°F if using an electric griddle).
- Test by sprinkling a few drops of water—they should dance and evaporate quickly.
- Lightly grease the surface with butter or oil before each batch.
Step 5: Perfect Pouring Technique
Secret five focuses on how you pour and shape your pancakes for consistent results.
- Use a ¼ cup measuring cup for uniform pancake size.
- Pour from a height of about 2 inches to allow batter to spread naturally.
- Resist the urge to spread the batter with your utensil—this deflates air bubbles.
Step 6: The Flip Timing Secret
Knowing exactly when to flip is secret number six for perfect texture.
- Wait until bubbles form across the surface and edges begin to look set (about 2 minutes).
- Flip with a confident, quick motion using a thin spatula.
- Cook for another 1-2 minutes until golden brown and cooked through.
Step 7: The Finishing Touch
The final secret involves how you handle the pancakes after cooking.
- Transfer cooked pancakes to a wire rack instead of stacking them on a plate.
- If serving a crowd, keep warm in a 200°F oven on a baking sheet.
- Avoid covering with foil, which traps steam and makes pancakes soggy.
Nutritional Information
- Understanding the nutritional profile of your gluten-free pancakes helps you make informed dietary choices. Per serving (3 medium pancakes):
- Calories: 320 kcal | Carbohydrates: 42g | Protein: 7g | Fat: 14g | Saturated Fat: 8g | Cholesterol: 115mg | Sodium: 680mg | Potassium: 230mg | Fiber: 2g | Sugar: 8g
- These pancakes contain approximately 25% fewer carbohydrates than traditional wheat pancakes while providing similar protein content. The addition of eggs boosts the protein quality, making these pancakes more satiating than many commercial gluten-free alternatives.
Healthier Alternatives for the Recipe
- Make these pancakes even more nutritious with these smart substitutions:
- Replace regular sugar with coconut sugar or maple syrup to lower the glycemic impact. The natural sweetness complements the vanilla beautifully without the refined sugar crash.
- Boost protein content by adding 2 tablespoons of hemp seeds to the batter. This increases the protein by approximately 6g per serving while adding beneficial omega fatty acids.
- For a dairy-free version, substitute buttermilk with almond milk mixed with 1 tablespoon apple cider vinegar, and use coconut oil instead of butter. This reduces saturated fat content by nearly 50%.
Serving Suggestions
- Elevate your pancake experience with these creative serving ideas:
- Create a “build-your-own” pancake bar with fresh berries, sliced bananas, chopped nuts, and different syrup options. This interactive approach makes breakfast more engaging for families.
- For a protein-packed breakfast, top with a dollop of Greek yogurt and a drizzle of honey. The tanginess of the yogurt balances the sweetness perfectly.
- Transform leftovers into sandwich thins by spreading with almond butter and a thin layer of jam. Wrap individually for grab-and-go breakfasts or snacks throughout the week.
Common Mistakes to Avoid
- Using cold ingredients – Cold eggs and milk don’t incorporate as well. Let them reach room temperature for 15-20 minutes before mixing.
- Skipping the rest period – This crucial step allows gluten-free flours to hydrate properly. Skipping it results in gritty, dense pancakes.
- Cooking at too high heat – High heat causes pancakes to brown quickly on the outside while remaining raw inside. Medium heat ensures even cooking.
- Flipping multiple times – Each flip deflates air bubbles. Flip just once when bubbles appear and edges set for maximum fluffiness.
- Pressing down with spatula – This common mistake squeezes out air pockets. Let the pancakes cook undisturbed for the fluffiest texture.
Storing Tips for the Recipe
- Make the most of your pancake-making efforts with these storage strategies:
- Refrigerate leftover pancakes in an airtight container with parchment paper between layers to prevent sticking. They’ll stay fresh for up to 3 days and reheat beautifully in a toaster.
- For longer storage, freeze completely cooled pancakes in a single layer on a baking sheet, then transfer to a freezer bag. They’ll maintain quality for up to 2 months.
- The dry ingredients can be premixed and stored in an airtight container for up to 3 months. Simply add the wet ingredients when you’re ready to make pancakes for a quicker morning routine.
Conclusion
Mastering the art of fluffy gluten-free pancakes doesn’t require professional culinary training—just attention to detail and these seven essential secrets. From selecting the right flour blend to perfecting your flipping technique, each step contributes to creating pancakes that rival or even surpass their gluten-containing counterparts.
Have you tried these techniques for your gluten-free pancakes? I’d love to hear about your experiences and any additional tips you might have discovered along the way! Share your pancake success stories in the comments below, or tag us in your breakfast creations on social media. Happy flipping!
Did You Try Our Recipe?
There are no reviews yet. Be the first one to write one.